hi, i'm Alex.
How to Use IcoMoon to Create and Integrate High Quality Vector Icon Fonts
2025-08-01 | Part 1 - Basics: Learn how to use IcoMoon to create custom icon fonts for your front-end projects tags: icomooniconshowtotools
 PT.1 How to Use IcoMoon to Create and Integrate High Quality Vector Icon Fonts
Lately, I’ve really grown to love working with icon fonts. There’s just something satisfying about using scalable, crisp vector icons that can be styled entirely with CSS. It makes designing and maintaining visual elements way more flexible, especially when you’re aiming for a clean, responsive UI and for reasons well enumerated elsewhere.
But if you’ve ever wanted to use custom icon fonts in your project, you’ve probably asked the big question:
“Where do I get them?”
That’s where IcoMoon comes in.
IcoMoon is a fantastic online tool that lets you build your own custom icon font set, using a mix of open-source icons, premium sets, or even your own SVGs. Whether you’re a designer or developer, it takes a lot of the heavy lifting out of the process.
I’ve used IcoMoon on a few recent projects and thought I’d share some of the things I’ve learned along the way. To keep things clear and easy to follow, I’m splitting this into a mini-series with three posts:
-
Getting Started with IcoMoon
- A beginner-friendly walkthrough on how to create your first icon font
-
IcoMoon in Your Workflow
- How I use it in real-world front-end projects
-
Advanced Tips & Tricks
- Some time-saving techniques and power-user hacks to level up your icon game
Whether you’re just getting started or you’ve used icon fonts before, I hope this series helps you get more out of IcoMoon.
Who This Series Is For
These posts are aimed at front-end developers, or really anyone who works hands-on with HTML and CSS to build real-world websites.
If you’re the kind of person who opens up DevTools more than Figma, you’re in the right place.
What I’m Assuming You Already Know
I’m going to assume you’re fairly comfortable writing HTML and CSS. You don’t need to be a guru, but you should know your way around things like:
- Class names and CSS selectors
- How to use attribute selectors css (
[class^="icon-"]) - Linking external fonts or stylesheets in your markup
If that sounds like you, we’re good to go.
What I Won’t Cover
This isn’t a tutorial on how to design icons or create a font from scratch. Those are deep subjects with entire books dedicated to them, and that’s a bit out of scope here.
Instead, I’ll focus on how to use IcoMoon to take existing icons and turn them into a custom icon font that’s easy to use, lightweight, and beautifully scalable in your projects.
To the Moon, Alice: Launching IcoMoon
Before we start generating custom icon fonts, let’s get you to the right part of the IcoMoon website.
IcoMoon offers downloadable packs of vector icons you can use in design tools like Figma or Illustrator, but what we’re interested in is the Font Generator App.
To get there:
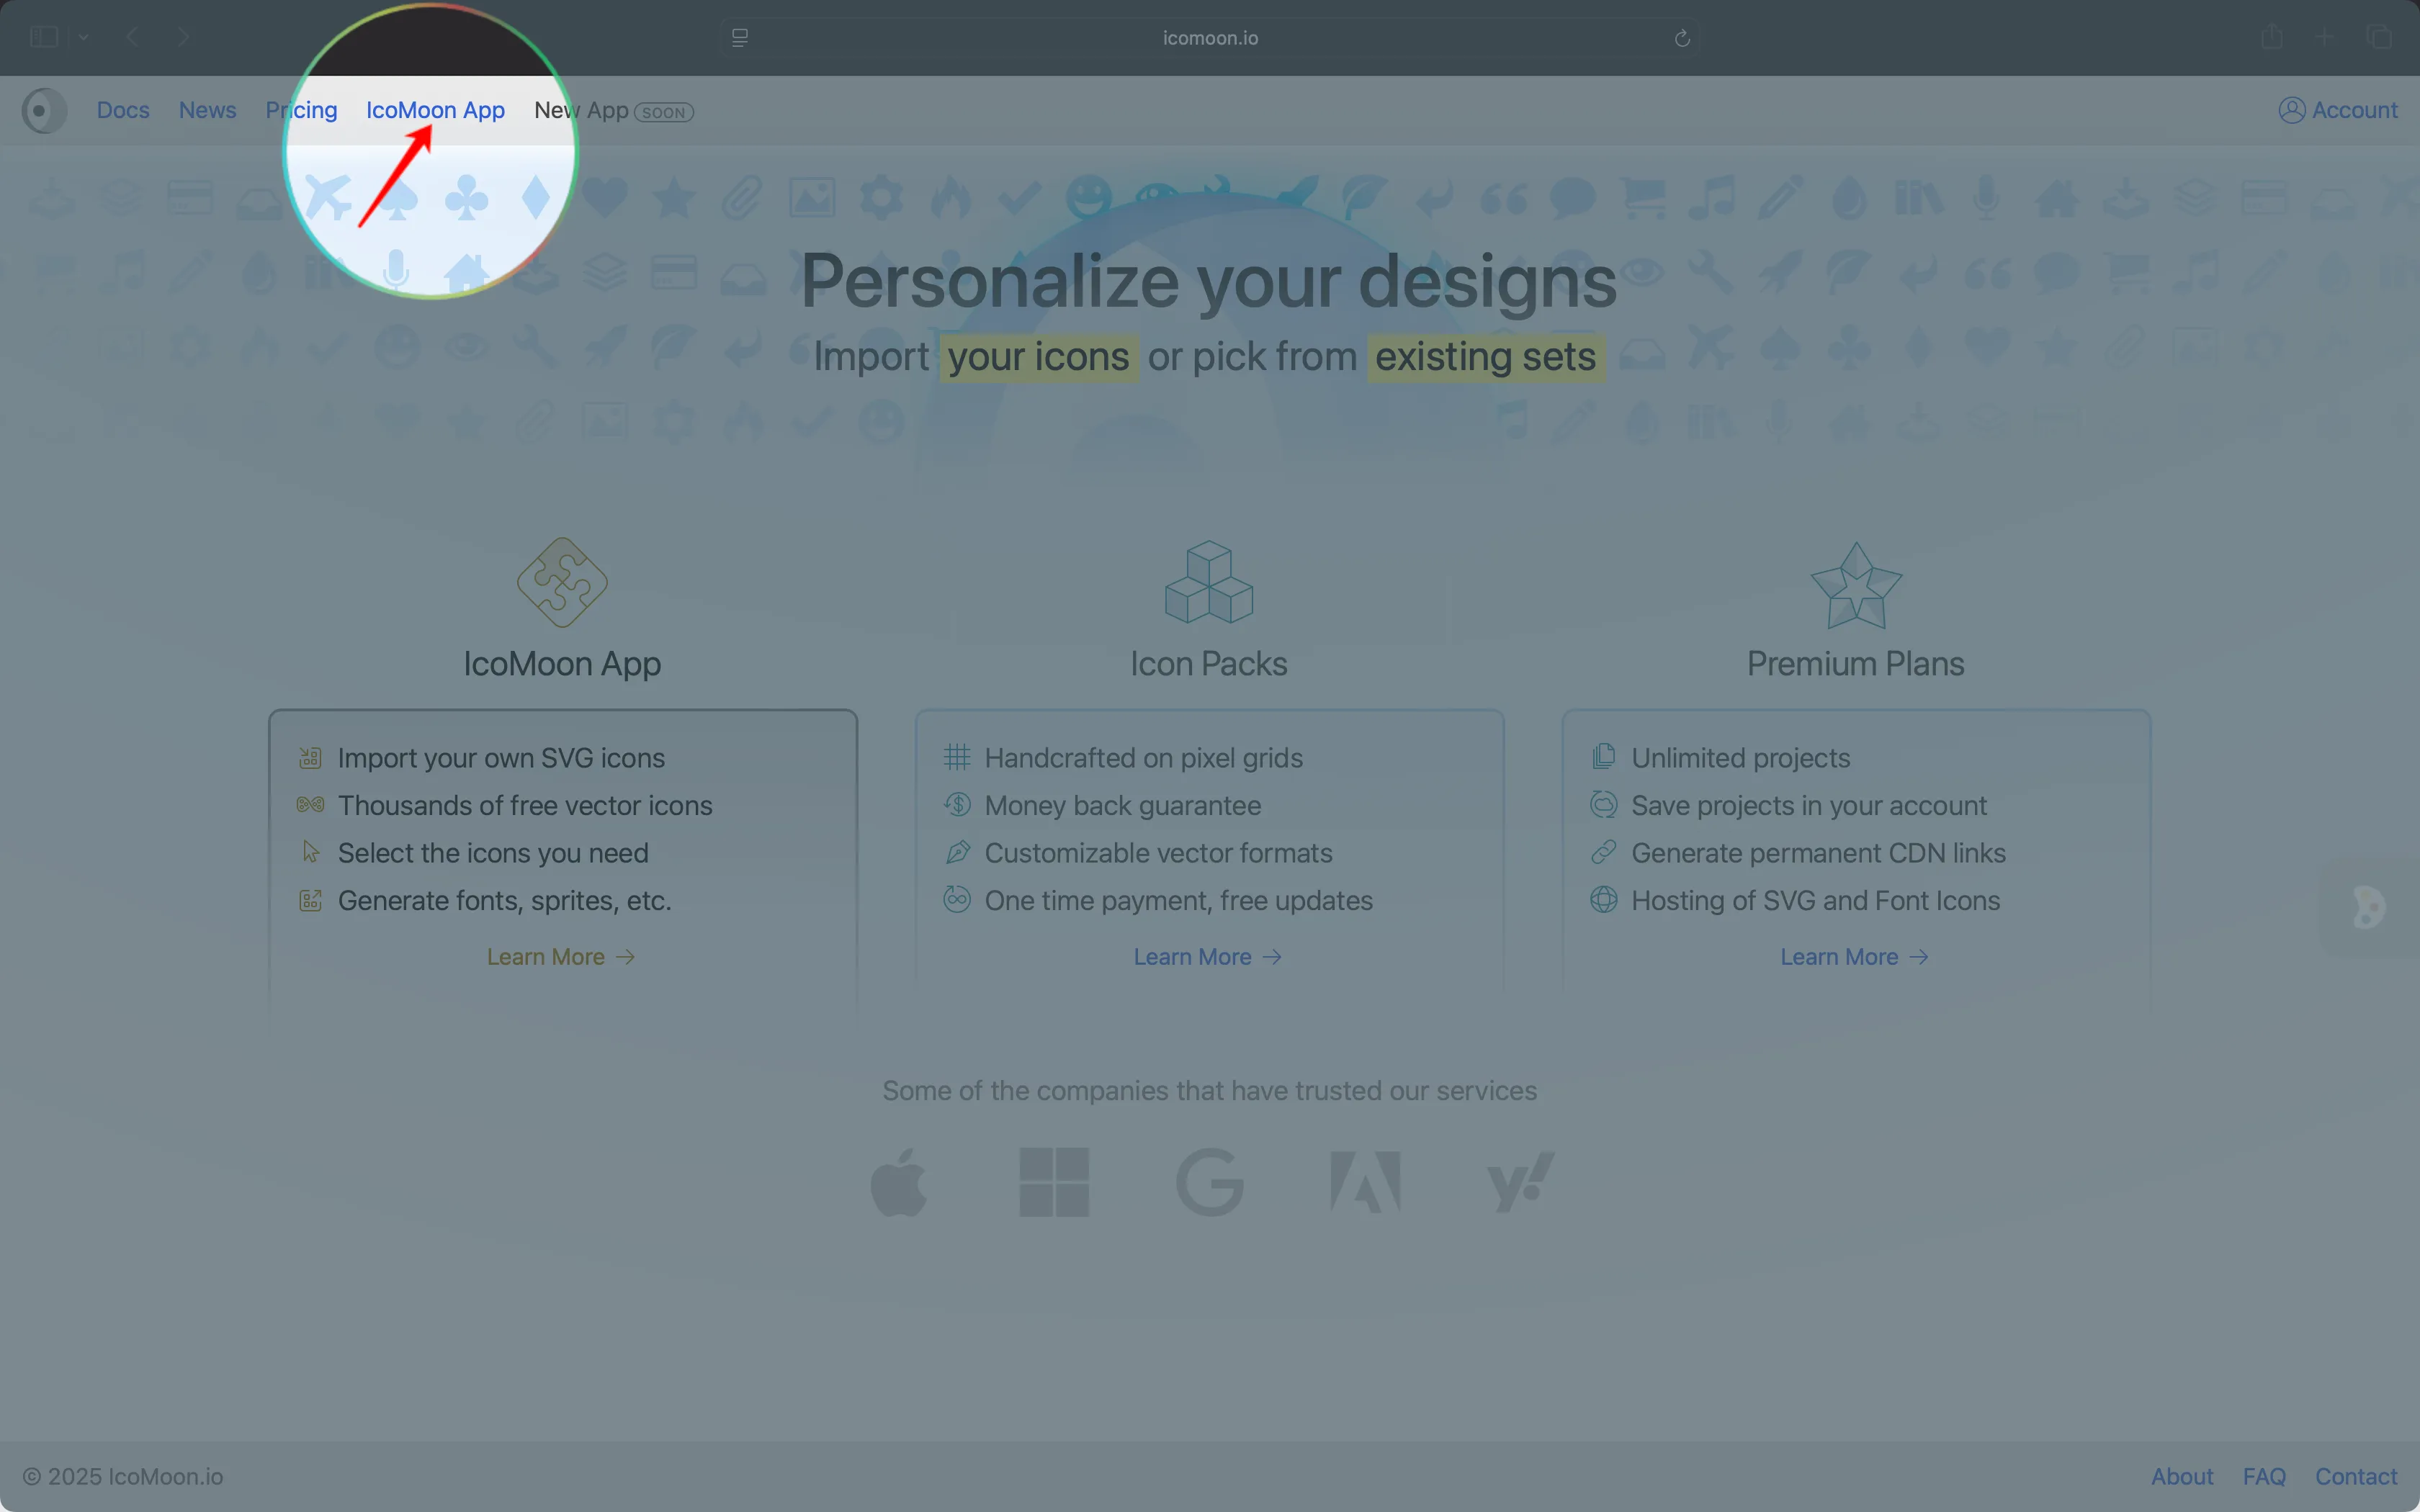
- Head over to icomoon.io
- Click on the “IcoMoon App” link in the top navigation
This will open up the IcoMoon App, a browser-based interface where you can build your custom icon set, manage selections, and export everything you need to integrate it into your project.
Don’t worry, we’ll walk through all of that in the next steps.

Now for the fun part — choosing the icons you want in your custom font.
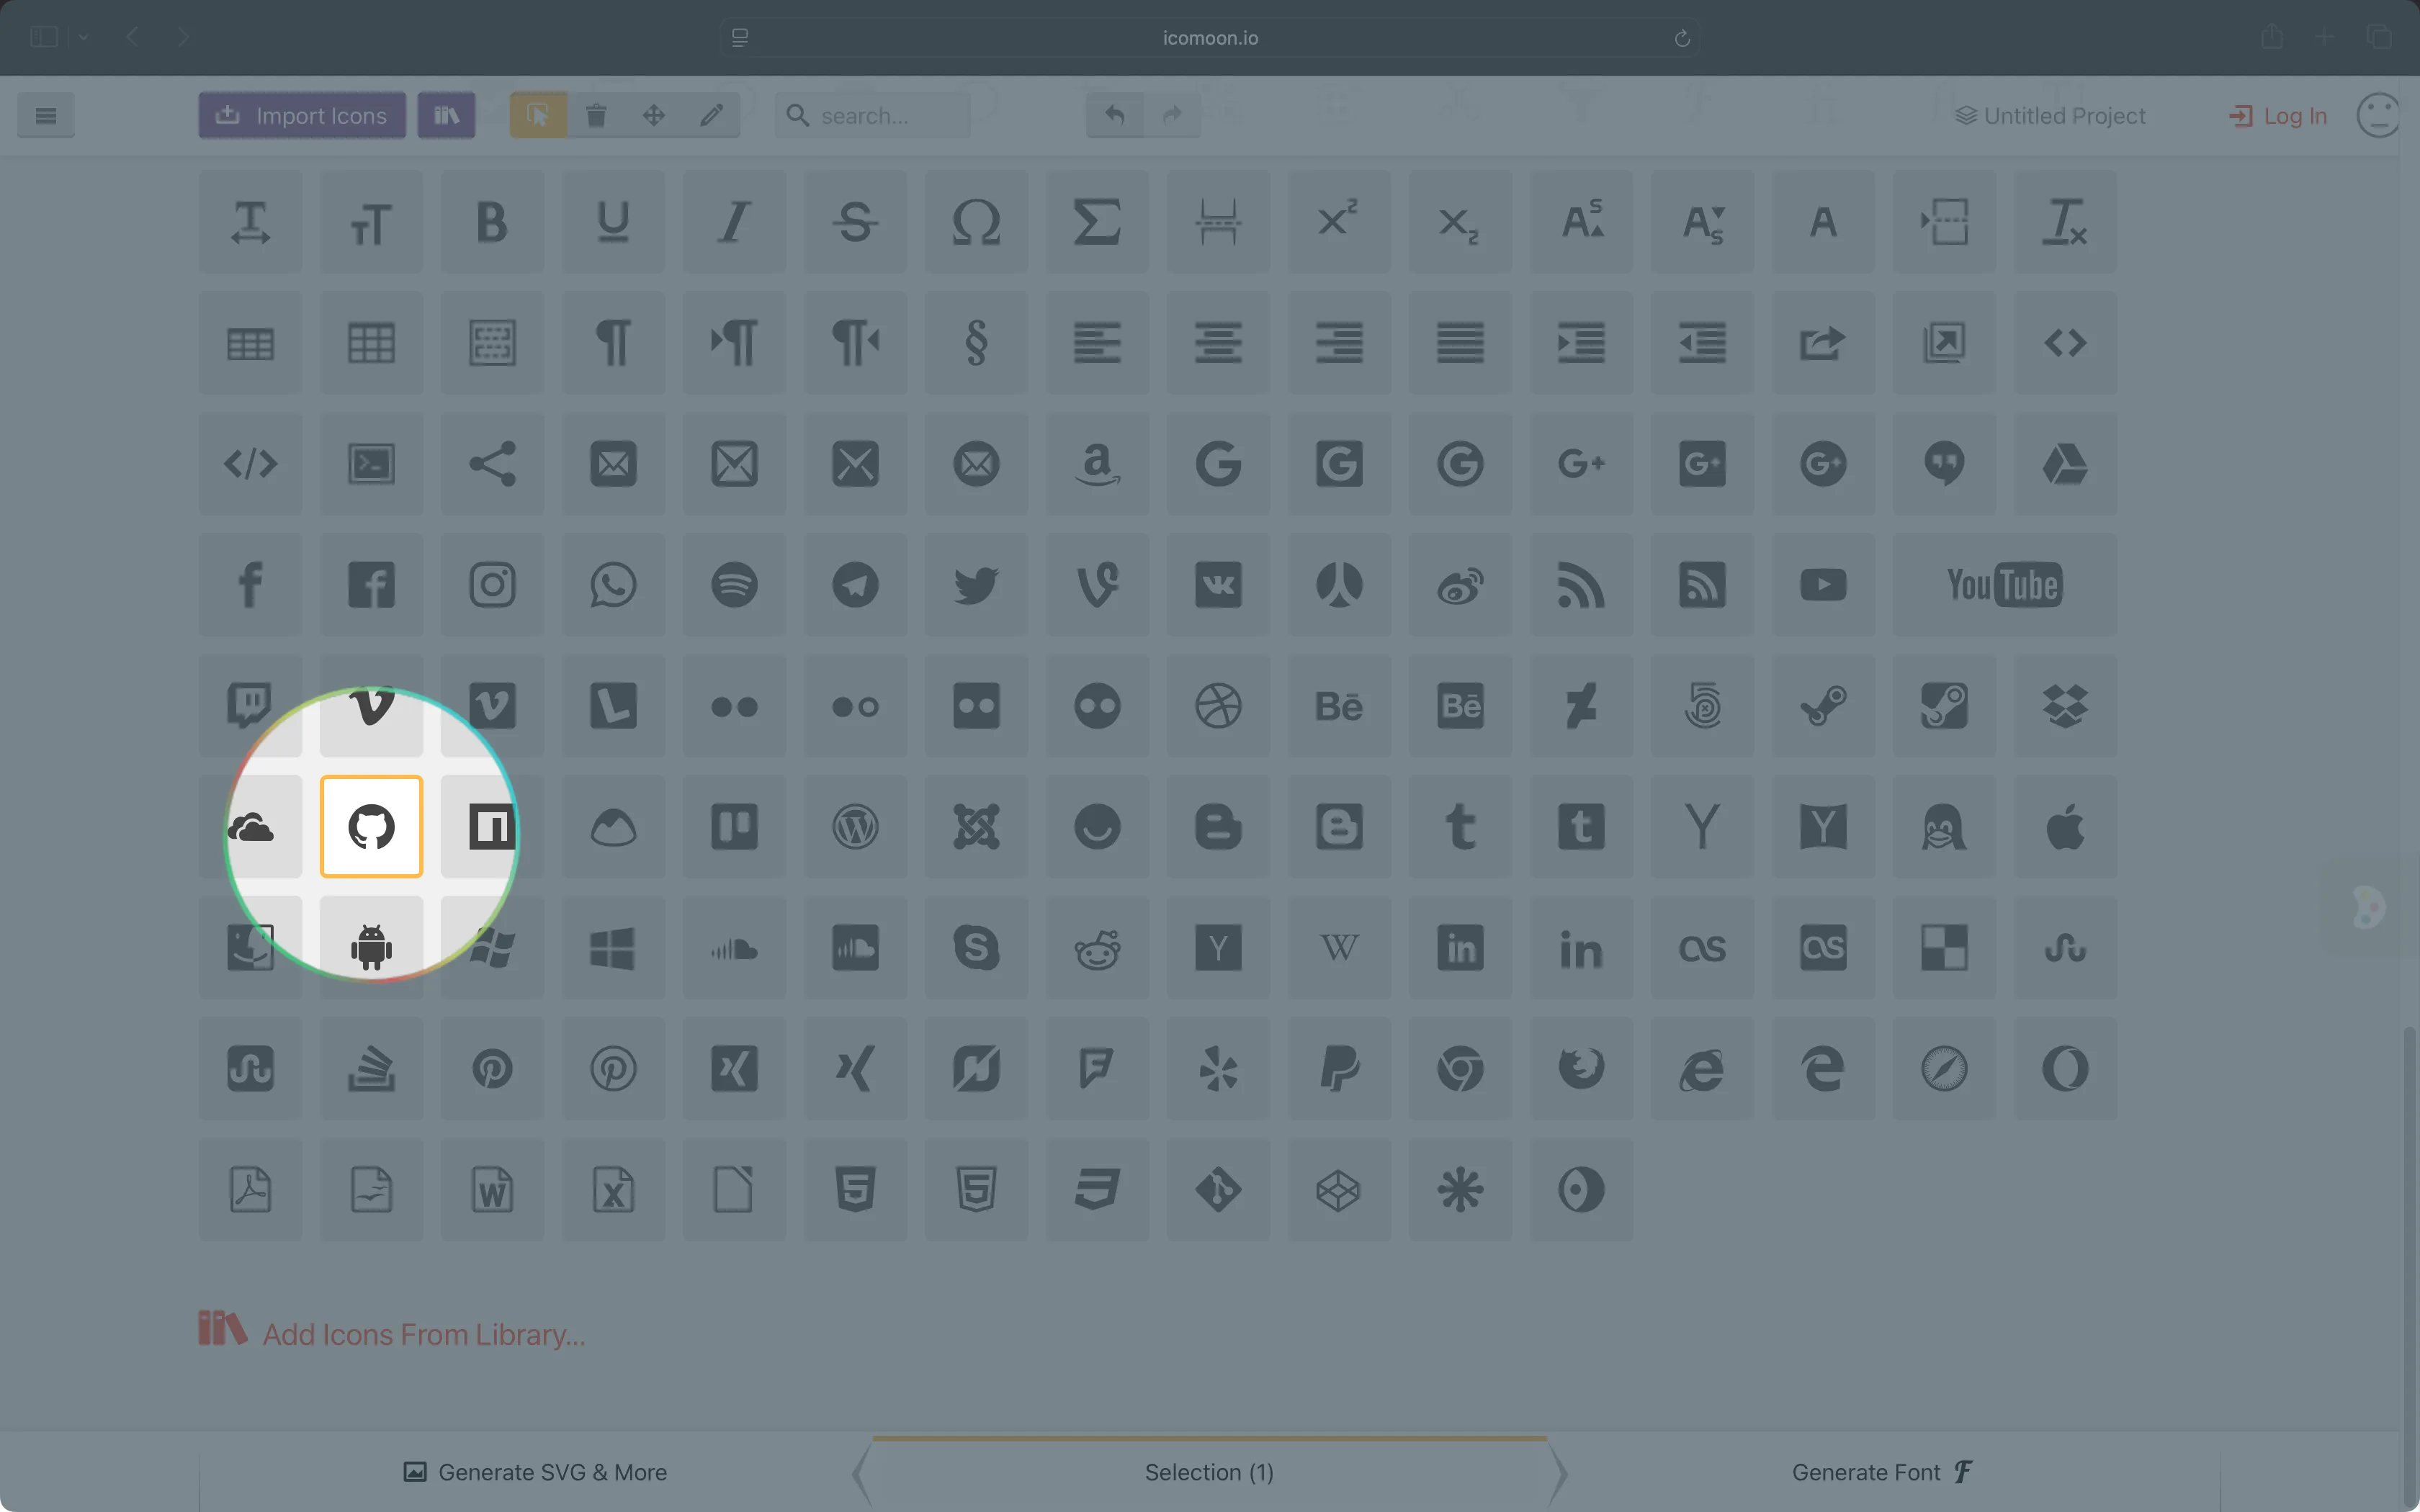
Once the IcoMoon App is open, you’ll see a grid of icons from the default IcoMoon - Free selection set. Take a few minutes to scroll through and explore. There’s a solid variety of common UI icons — arrows, social logos, interface symbols, and more. Or search for an icon you already have in mind.
In my case, I’m grabbing this GitHub icon

To select an icon, simply click on it. That’s it! You’ll see it get added to your selection tray at the bottom of the screen. Click again to deselect if you change your mind.
You can select as many icons as you want, whether it’s a handful or a full set. I usually end up with around 20 to 30 icons in a project, but there’s no hard limit. Just keep in mind that more icons = slightly larger file size.
Tip: Want to get fancy? You can even import your own custom SVGs or explore other icon sets inside the app.
We’ll cover that in Part 3 of this series, along with some tips for naming and organizing your icons like a pro.
Once you’ve got your icons picked out, we’ll move on to generating your font and integrating it into your site.
Generating the font
Once you’ve picked all the icons you want to include, it’s time to generate your custom font.
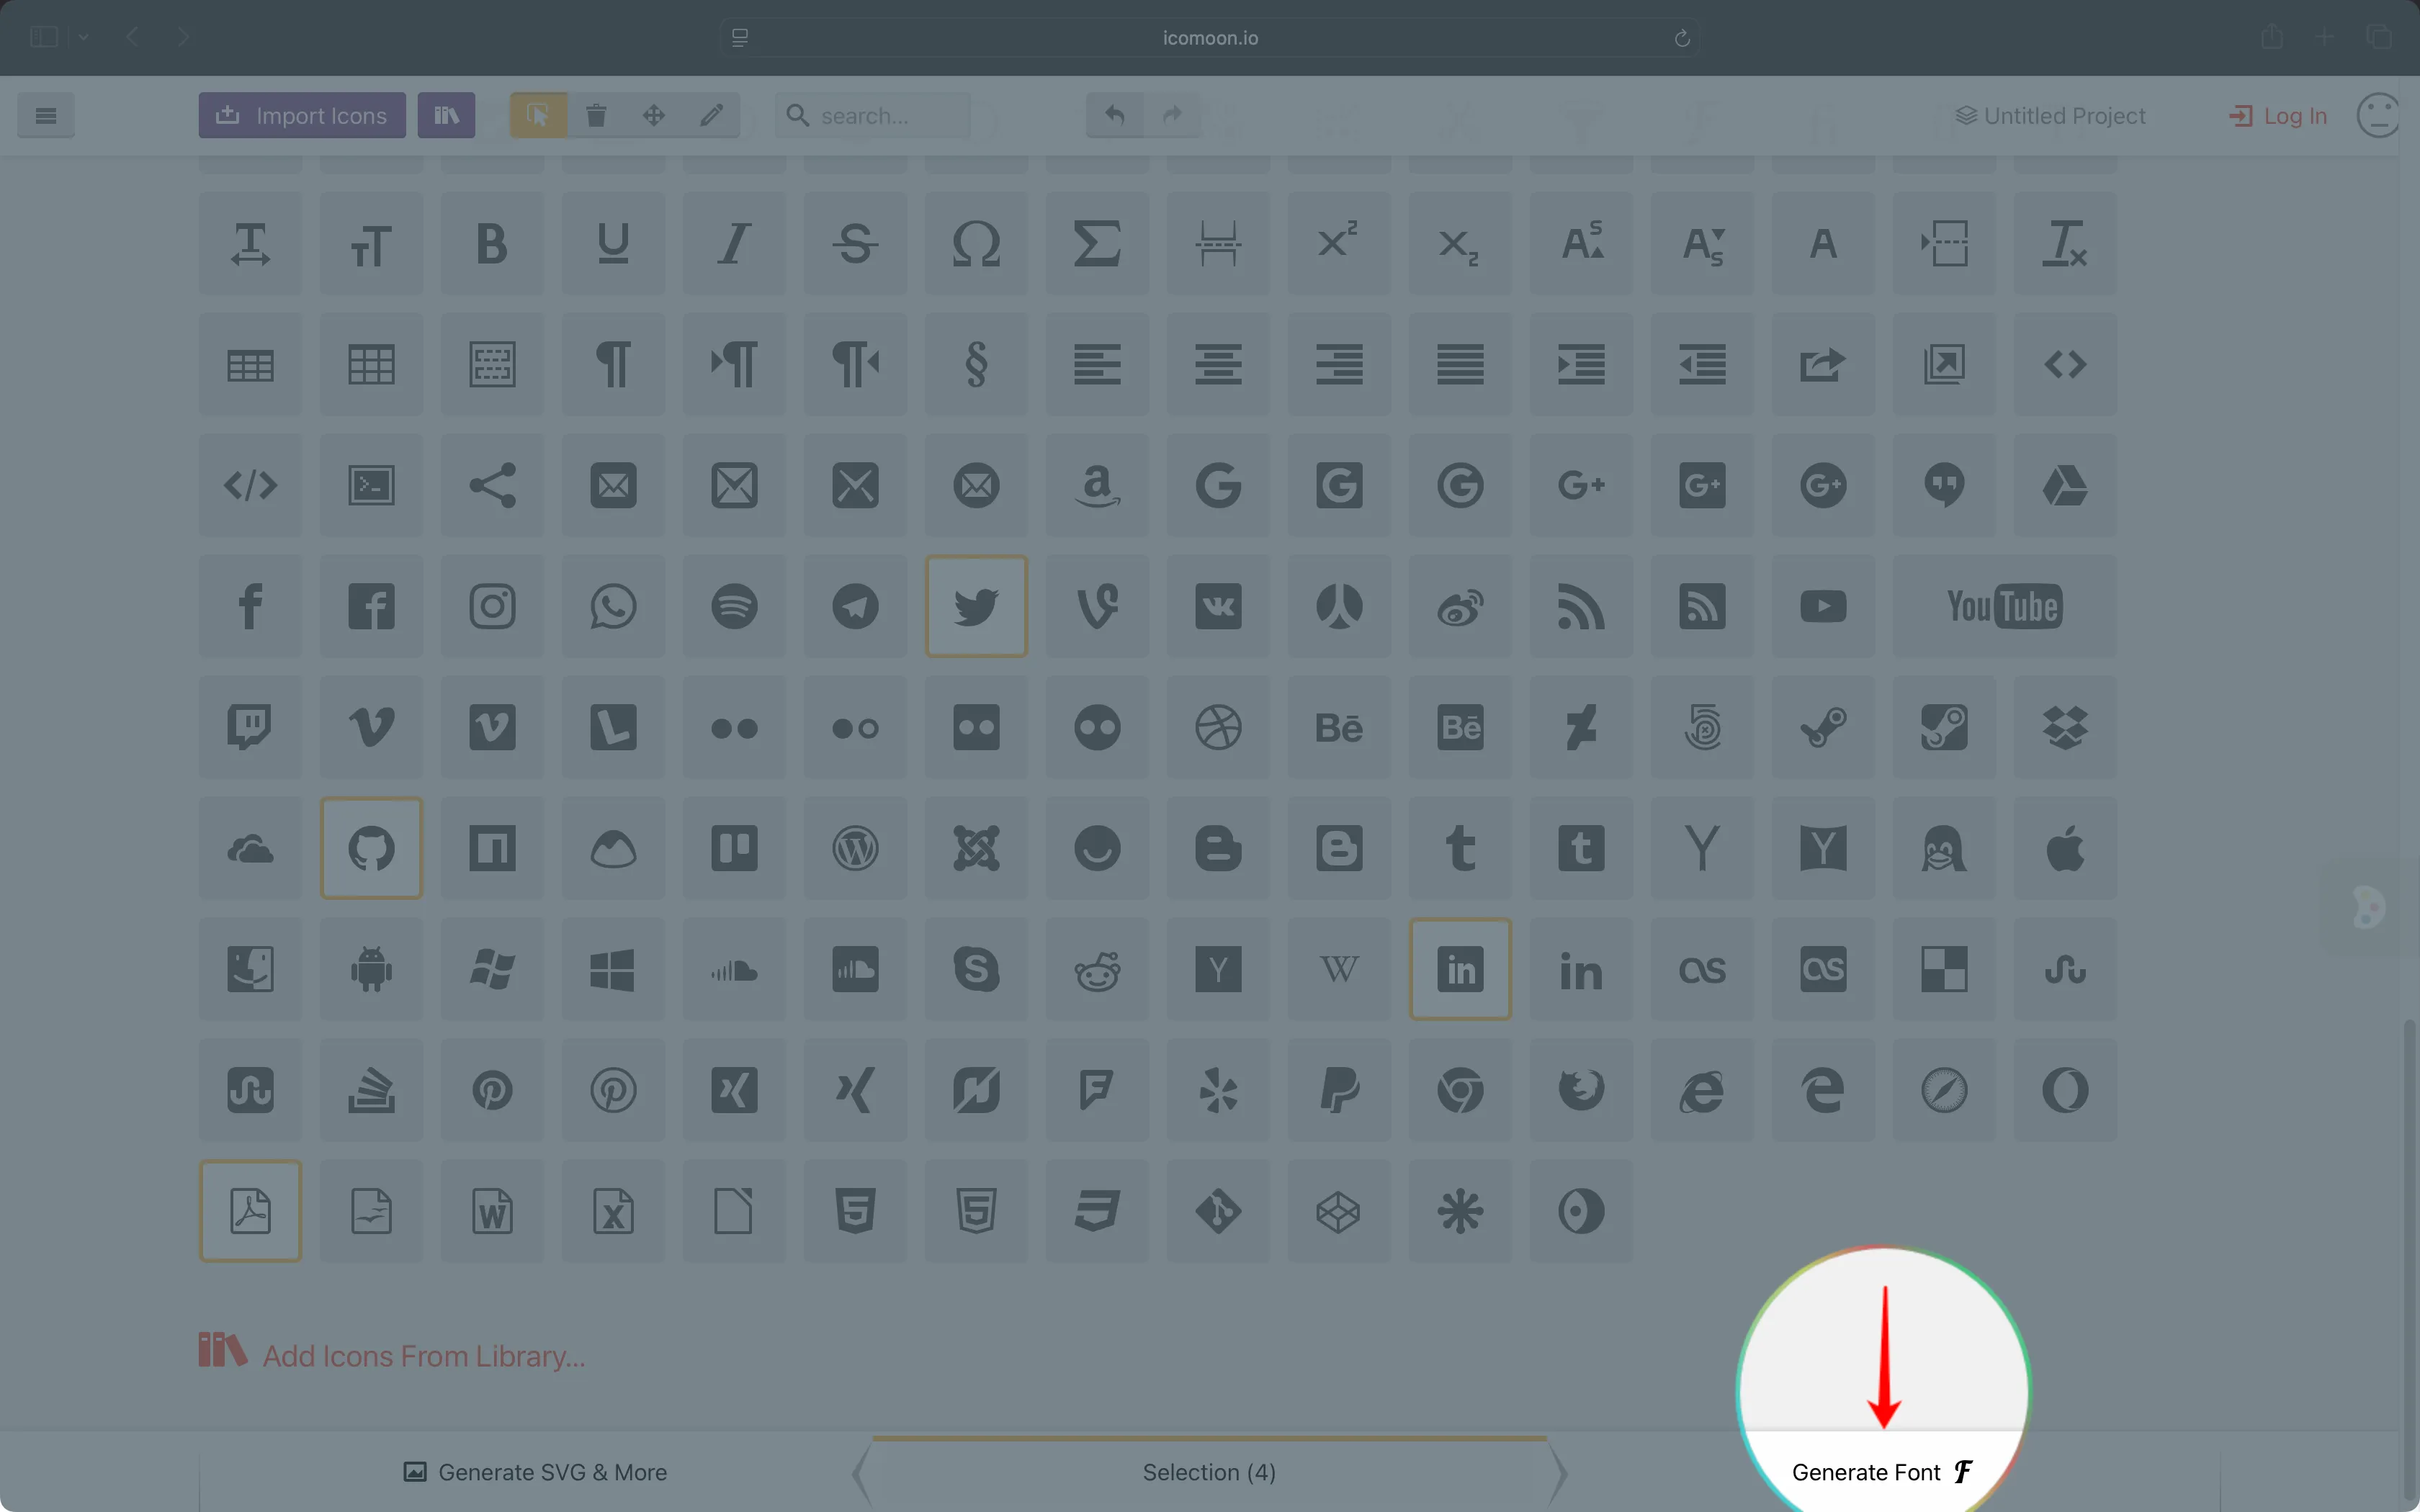
At the bottom of the screen, look for the “Generate Font” button (it’s right next to “Selections”).

Go ahead and click it. This will take you to the Font Generator screen.
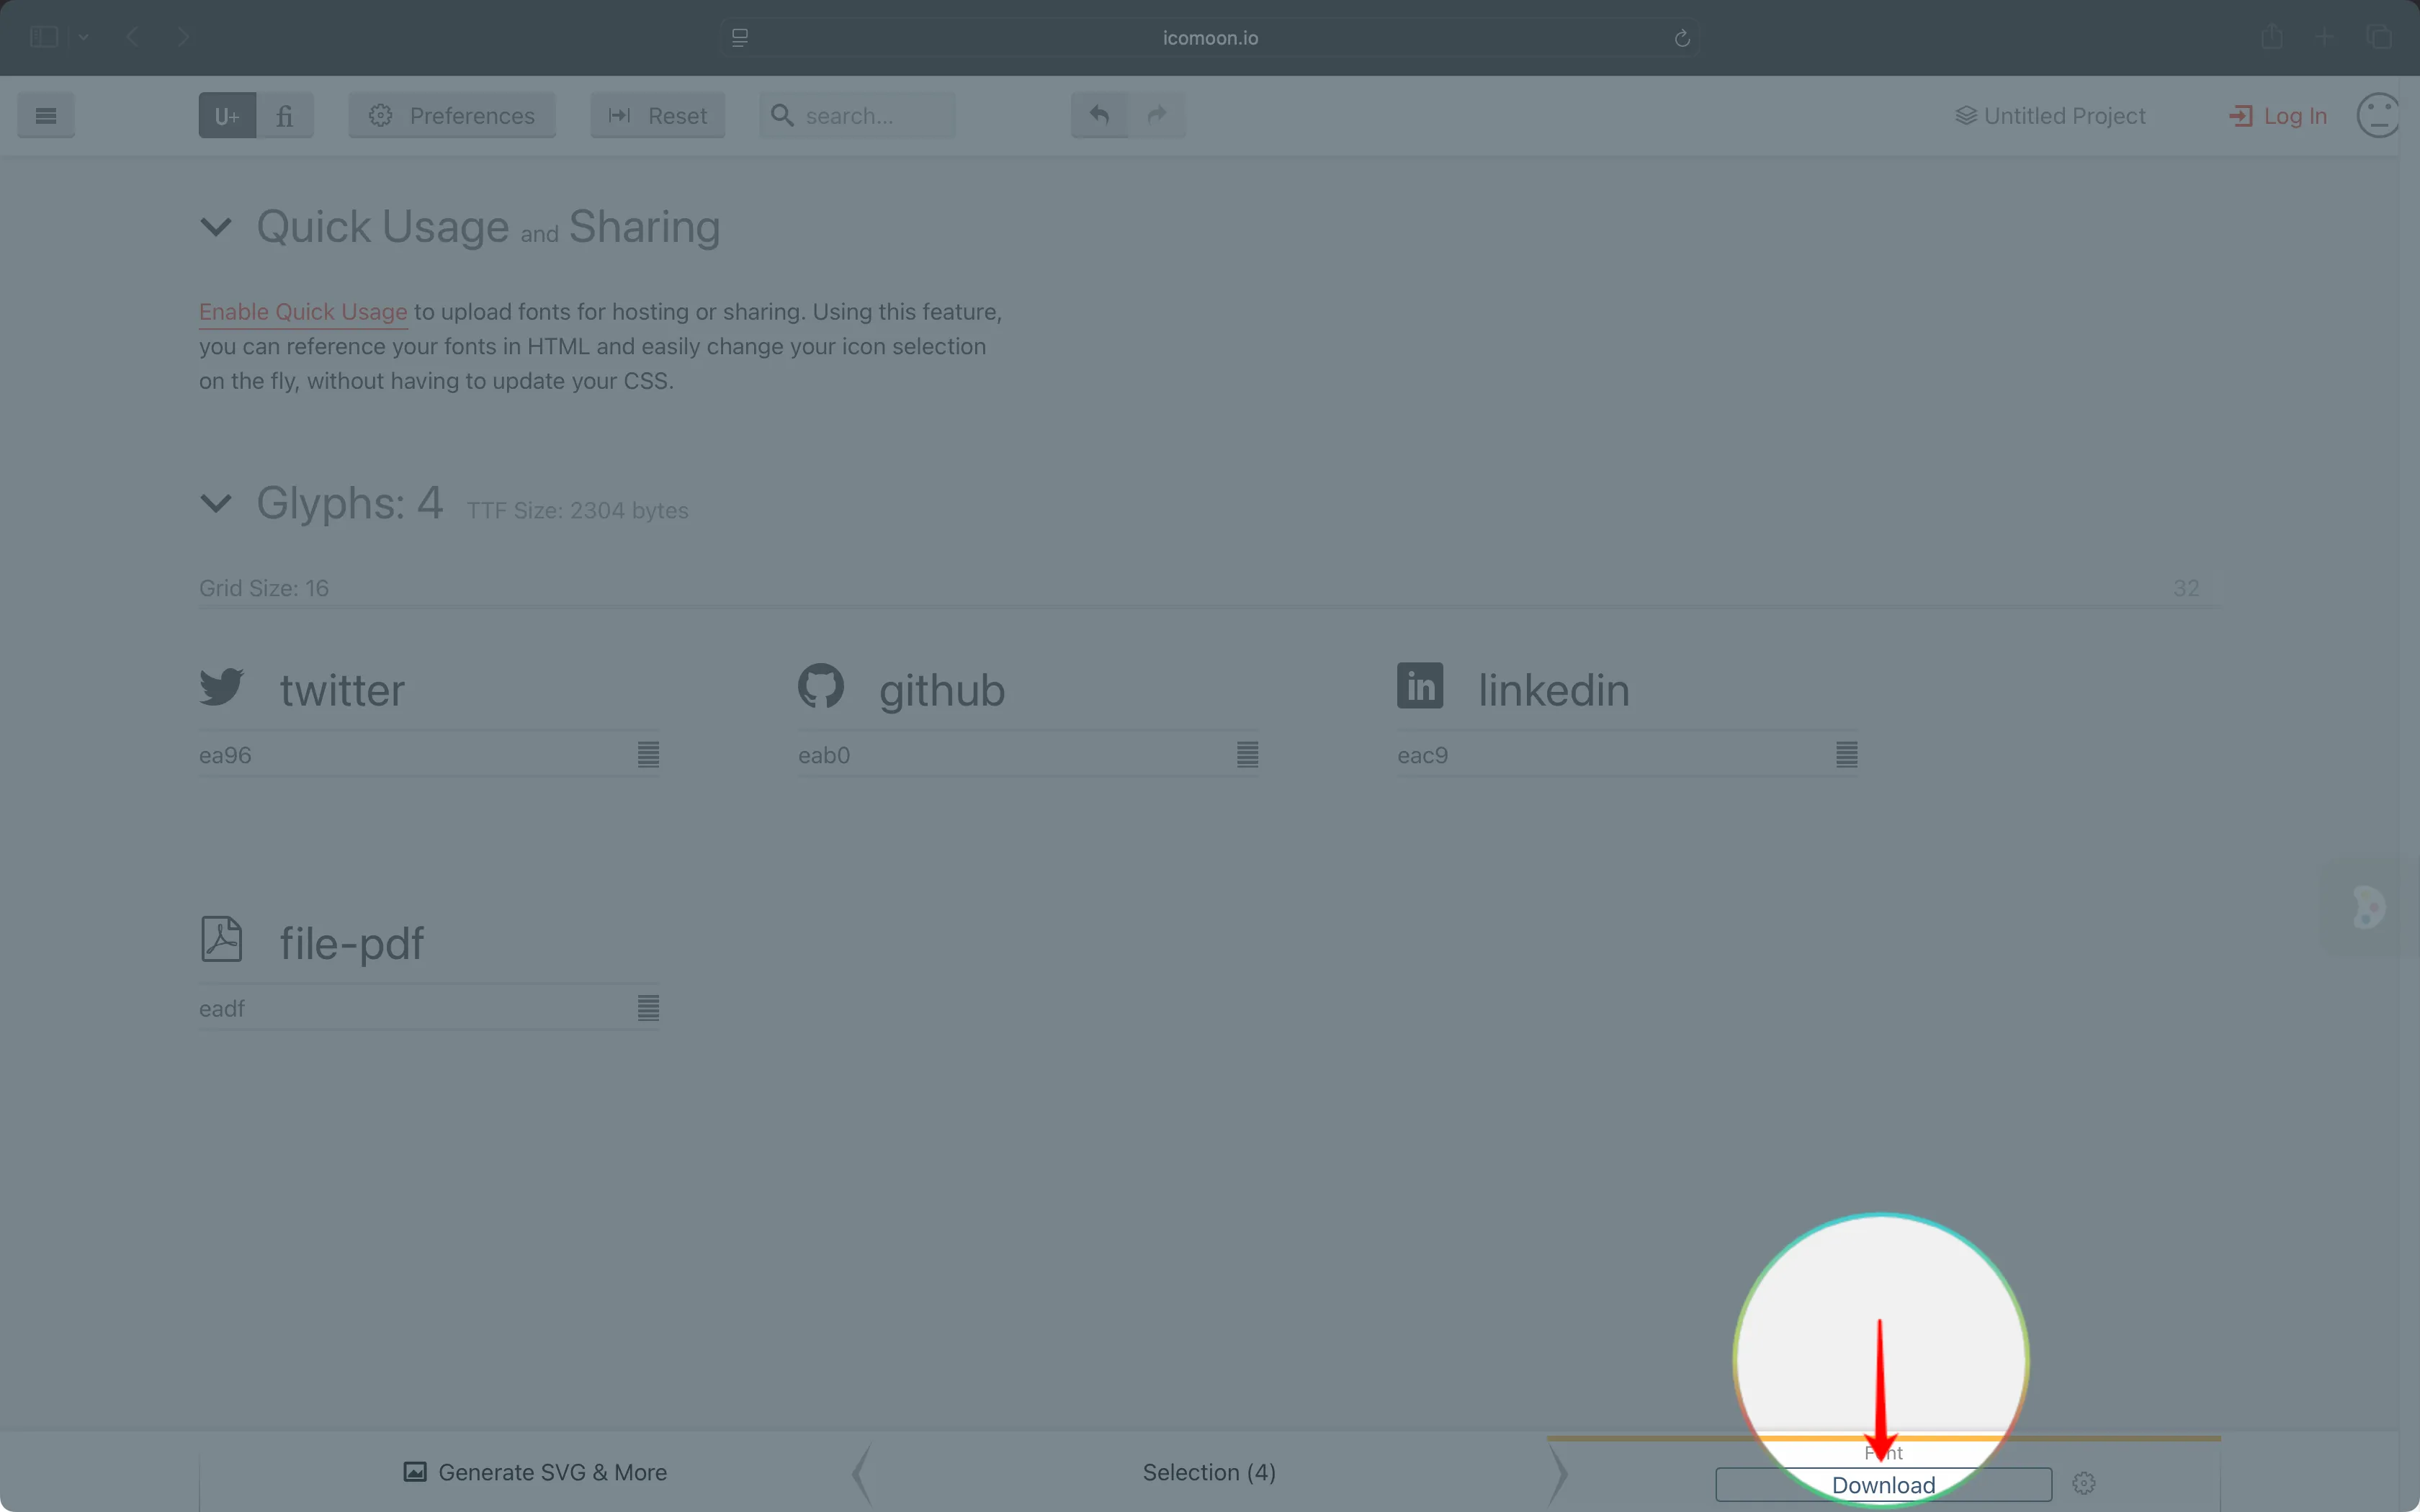
Here, you’ll see a preview of every icon you selected, along with some extra info like the unicode value for each one (don’t worry, we’ll talk about how that works in a later step).

If everything looks good, hit the “Download” button. IcoMoon will then package everything into a handy ZIP file.
What’s in the Downloaded ZIP?

demo-files/folder
Supporting files used by demo.html. You don’t really need to worry about these for your actual project. Feel free to ignore them.demo.html
A ready-to-go HTML file that shows all your icons in action. Super handy for quick reference or testing how they look in the browser.fonts/folder
This is where the actual font files live — usually.eot,.svg,.ttf, and.woff. These are the files your browser uses to render the icons.Read Me.txt
A brief overview of what’s included and how to use it.style.css
This file contains all the CSS class names mapped to your icons (e.g..icon-github,.icon-linkedin, etc). You’ll need to include this (or parts of it) in your project to use the icons.selection.json(Added in Fall 2013)
This little file is gold. It saves your icon selections and settings. If you ever want to go back and tweak your icon set, just upload this file back into the IcoMoon App. It’ll restore everything: selections, order, names, unicode assignments.
(Pro tip: Keep this file in version control. It’ll save your future self a ton of time.)
How I Organize My Icon Fonts
Here’s how I usually set things up in my projects:
- I create a top-level
/fonts/directory right next to/css/ - I drop the whole IcoMoon folder in there so I have everything in one place
- Then I copy just the font files I need (
.ttf,.woffetc.) up into the top level of/fonts/. This helps simplify my import paths
I still keep the original structure intact, I just duplicate what I need for clarity and control.

Why copy them instead of linking directly?
We’ll cover that in Part 2, where I walk through integrating IcoMoon into a real front-end workflow.
Using Your Icons in HTML & CSS
Alright, you’ve downloaded your custom icon font, now let’s actually use it in your project!
There are two main parts to this:
- Loading the icon font using CSS
- Inserting the icons into your HTML
Let’s walk through each one.
Loading the Icon Font with CSS
Open the style.css file that came in your IcoMoon download. Near the top, you’ll find a @font-face rule that looks something like this:
@font-face {
  font-family: 'icomoon';
  src:  url('fonts/icomoon.eot?tsq330');
  src:  url('fonts/icomoon.eot?tsq330#iefix') format('embedded-opentype'),
    url('fonts/icomoon.woff2?tsq330') format('woff2'),
    url('fonts/icomoon.ttf?tsq330') format('truetype'),
    url('fonts/icomoon.woff?tsq330') format('woff'),
    url('fonts/icomoon.svg?tsq330#icomoon') format('svg');
  font-weight: normal;
  font-style: normal;
  font-display: block;
}
This block tells the browser where to find your icon font files and what to call it (icomoon, in this case).
Depending on how your project is structured, you might need to tweak the file paths. For example, if your CSS lives in a /css/ directory and your fonts are in /fonts/, you’ll likely need to insert ../ into the fonts path like:
@font-face {
  font-family: 'icomoon';
  src:  url('../fonts/icomoon.eot?tsq330');
  src:  url('../fonts/icomoon.eot?tsq330#iefix') format('embedded-opentype'),
    url('../fonts/icomoon.woff2?tsq330') format('woff2'),
    url('../fonts/icomoon.ttf?tsq330') format('truetype'),
    url('../fonts/icomoon.woff?tsq330') format('woff'),
    url('../fonts/icomoon.svg?tsq330#icomoon') format('svg');
  font-weight: normal;
  font-style: normal;
  font-display: block;
}
The goal is to make sure your CSS knows where to find the fonts relative to its own location.
Inserting Icons into Your HTML
There are two main ways to use the icons you selected:
- Using class names that follow the
icon-naming pattern - Applying icons directly with a CSS
:beforepseudo-element
Let’s look at both.
Using class names (Most Common)
The most common (and current) way to insert icons is by using class names that follow the icon- naming pattern. Like: .icon-github, .icon-linkedin, etc.
<span class="icon-github"></span>You can use a <span>, <i>, or any other inline element. Just be sure to target an icon class that exists in your CSS, and that your /css/style.css is loaded correctly.
IcoMoon’s generated CSS includes a rule like this:
[class^="icon-"], [class*=" icon-"] {
  /* use !important to prevent issues with browser extensions that change fonts */
  font-family: 'icomoon' !important;
  speak: never;
  font-style: normal;
  font-weight: normal;
  font-variant: normal;
  text-transform: none;
  line-height: 1;

  /* Better Font Rendering =========== */
  -webkit-font-smoothing: antialiased;
  -moz-osx-font-smoothing: grayscale;
}
This rule ensures that any element with a class starting with icon- gets rendered using the correct font and styling.
Tip: You can preview available icon class names and unicode values by opening the
demo.htmlfile from your IcoMoon download.
Using Pseudo-Elements in CSS
If you’re working in a context where you can’t change the HTML easily (say, within a CMS or framework), you can also apply icons directly in CSS using pseudo-elements:
.icon-github:before {
  content: "\efc4";
  font-family: 'icomoon';
  speak: never;
}
This adds the icon before the content of any element with the class .icon-github.
You can style the icon just like text:
.icon-github:before {
  content: "\efc4";
  font-family: 'icomoon';
  speak: never;
  font-size: 1.5rem;
  color: #333;
  margin-right: 0.5rem;
  transition: transform 0.2s ease;
}
And that wraps up the basics of using your IcoMoon icon font — from setup to actual usage.
In Part 2, I’ll dive into how I organize my IcoMoon files, manage updates, and use these fonts in a real-world front-end workflow.
Stay tuned, and have fun with your new icons!